 Save Pin
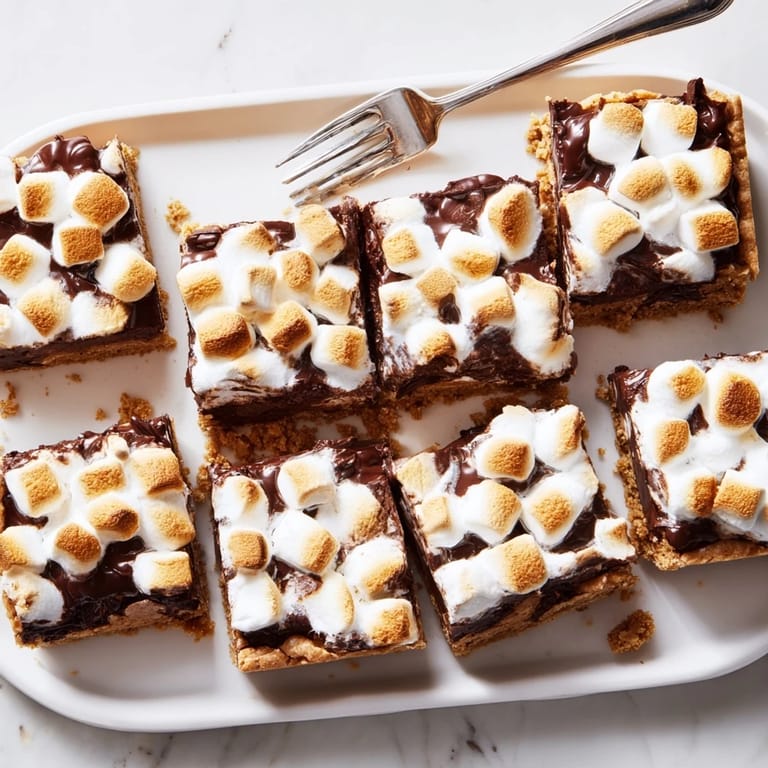
 Last summer, my daughter came home from camp raving about s'mores and demanding we recreate the magic in our kitchen. I'll admit I was skeptical that anything could beat the real deal over an open fire, but these bars proved me wrong in the most delicious way possible. Now they're our go-to treat whenever we need campfire vibes without the hassle of building a fire.
I brought these to our neighborhood block party and watched them disappear in record time. My neighbor's kids actually cheered when they saw the pan, and several parents asked for the recipe before they'd even finished their first bar. Something about that combination of textures just makes people happy instantly.
Ingredients
- Graham cracker crumbs: These form the buttery foundation that holds everything together, so press them firmly into the pan for a crust that won't crumble when you slice.
- Unsalted butter: Melted thoroughly so every single crumb gets coated in rich buttery goodness that bakes into something wonderfully crisp.
- Granulated sugar: Just enough sweetness to enhance the natural honey notes in the graham crackers without making the crust overly sweet.
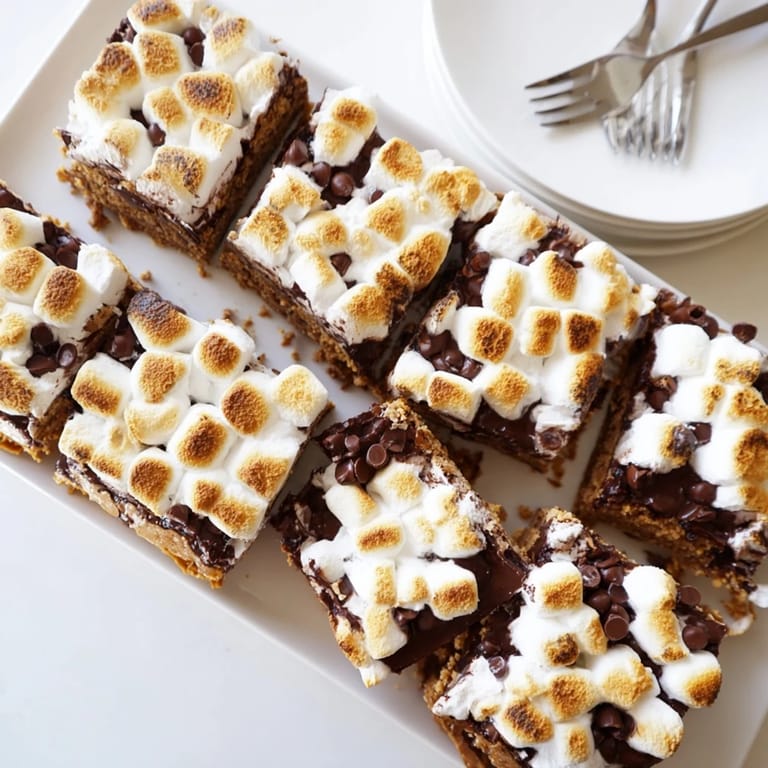
- Semi-sweet chocolate chips: Spread them while they're still warm from the oven so they melt into an even fudgy layer that's not too intense for kids.
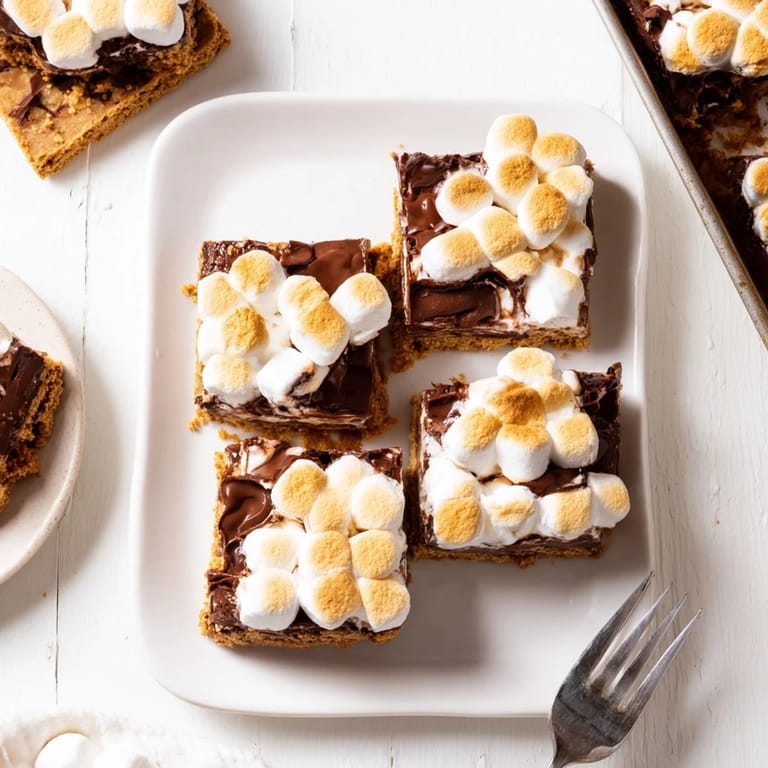
- Mini marshmallows: These toast more evenly than regular sized ones and create that perfect golden brown bubbly top everyone fights over.
Tired of Takeout? 🥡
Get 10 meals you can make faster than delivery arrives. Seriously.
One email. No spam. Unsubscribe anytime.
Instructions
- Preheat your oven and prepare the pan:
- Set your oven to 350°F and line an 8x8 inch baking pan with parchment paper, letting the edges hang over so you can lift the whole thing out later like a pro.
- Make the graham cracker crust:
- Mix those crumbs with melted butter and sugar until everything looks like wet sand, then press it into your pan with such firm pressure that nothing shifts during baking.
- Pre-bake the crust:
- Slide the crust into the oven for 8 minutes so it sets up properly and won't get soggy when the layers go on top.
- Add the chocolate layer:
- Scatter your chocolate chips evenly over that hot crust, give them just 2 minutes to soften, then spread them around with your spatula until smooth.
- Top with marshmallows and finish baking:
- Arrange mini marshmallows across the chocolate and bake for 10-12 minutes until they're puffed and golden brown in spots, watching closely so they don't burn.
- Cool completely before slicing:
- Let the bars cool entirely in the pan, then chill for an hour so everything sets up perfectly and you get those gorgeous clean cuts when you slice.
 Save Pin
 These bars have become our Friday night movie tradition, something the whole family looks forward to all week. There's something about pulling that parchment paper and seeing those golden toasted marshmallows that just feels like comfort and home all at once.
Making Ahead And Storage
I've learned these bars actually taste better the next day when all the flavors have had time to mingle and the textures settle into perfect harmony. Store them in an airtight container at room temperature for up to three days, though I've never had them last that long in my house.
Getting The Perfect Toast
If you want that extra campfire char without using your oven's broiler, try a kitchen torch held about six inches above the marshmallows. Just keep it moving in circles and you'll get those beautiful toasted spots that make these bars look professionally made.
Serving Suggestions
These are incredible slightly warmed in the microwave for about 15 seconds, which makes the chocolate extra gooey and the marshmallows puff up like fresh. Serve them alongside vanilla ice cream or crumble one over hot chocolate for the ultimate dessert experience.
- Try swapping in milk chocolate if your family prefers things sweeter
- A pinch of sea salt on top creates this amazing salted chocolate effect
- Digestive biscuits work beautifully if you can't find graham crackers
 Save Pin
 There's nothing quite like that first warm bite, all gooey chocolate and toasted marshmallow, to remind you why simple desserts are often the best ones. Hope these become as special in your house as they are in ours.
Recipe Questions
- → Can I make these bars ahead of time?
Absolutely. These bars store beautifully in an airtight container at room temperature for up to 3 days. For best results when slicing, refrigerate for at least 1 hour before cutting. They can also be frozen for up to 2 months—wrap individual portions in plastic and foil.
- → Why did my marshmallows burn?
Marshmallows can go from golden to burnt quickly. Keep a close eye during the final 10–12 minutes of baking. If your oven runs hot or has hot spots, reduce baking time to 8–10 minutes. Broiling for 1–2 minutes at the end is another option for extra toasting, but watch constantly.
- → Can I use homemade marshmallows?
Homemade marshmallows work wonderfully and add incredible flavor. Cut them into small, even pieces before scattering over the chocolate layer. Note that fresh marshmallows may take slightly longer to achieve that golden toasted appearance compared to store-bought mini marshmallows.
- → What's the best way to get clean cuts?
Chilling is key. Let bars cool completely, then refrigerate for at least 1 hour before slicing. Use a sharp knife wiped clean between cuts. For extra precision, run the knife under hot water and dry between slices. Lift the entire block out using the parchment paper overhang before cutting.
- → Can I substitute the graham crackers?
Yes. Digestive biscuits, vanilla wafers, or even crushed shortbread cookies make excellent substitutes. Keep the ratio the same: 1 1/2 cups of crumbs mixed with melted butter and sugar. Each variation brings a slightly different flavor profile while maintaining that essential buttery crunch.
- → Should I serve these warm or room temperature?
Both are delicious. Warm bars have maximum gooeyness and melted chocolate—simply heat individual portions for 15–20 seconds in the microwave. Room temperature bars are easier to handle and have a pleasant fudgy texture. Chilled bars offer a firmer, candy-like consistency perfect for warmer days.